Monday, July 8, 2013

Duct Tape Wrapped Picture Frame

I made a stop at the craft store to pick up a couple items, and score! they were having a sale. Their Duct Tape was on sale. I grabbed two rolls of Redskins tape for 50%! (That came to $10 for both)  While I was waiting in line, a lady asked me if I was going to make a wallet with the tape. I know I can pass for a few years younger, but I had no idea I looked 13! I honestly wasn't sure what I was going to do, I just thought it looked cool and I would figure out something later. Of course I didn't say that. I just said the first thing that popped into my head.... "I'm going to wrap a picture frame with it!" She loved the idea and told her friends who also loved it. So, it was settled. I was going to decorate a picture frame with duct tape.

I did this in about 10 minutes, while watching TV.


I've never seen this done before, but I knew I wanted the frame to have a wrapped feel. It's going in a room dedicated solely to the Skins, so we don't need to see the logo or team name on the frame. 


Wrapping the tape around the frame would have made it too bulky, and would make it harder to get the angle I wanted. So instead, I cut the tape into short strips. That also gave me some control over what part of the design would show. I wanted it to look random, but I did a little adjusting. 


I am so happy I got the background color of the art right! I don't like to steal other people's work, but I couldn't find the original creator of this design, so I made my own. Using just Microsoft Word starter, I made my own color maroon (score it worked!), decided on a font that I liked for the words, and arranged them. Then I cropped and added the logo. I printed it off at Staples for 50c. 


It turned out better than I thought it would, and I can't wait to see how DH likes it! 
("Hail to the Redskins" is the saying, hence the "Hail On") 


-DearLadyDisdain

Memory Shadow Box

After finishing our travel map cork board, I decide to finally make a memory shadow box like I've seen all over Pinterest. This took me a few minutes, and was so simple. The longest step was gathering the supplies.

You need


A shadow box. I snag these whenever I see them in good condition at thrift stores. I know this one says $1.91, but I bought it on a 50% off day! Can't beat a $1 project!


 Your memories. Most of the ones I found were from a few years ago, when I decided I was going to scrapbook. That didn't make it past three pages, but I did at least have all our little mementos well organized.


Embellishments. I decided to go with some stickers and scrapbook paper.


Step one: Apply a background to your frame. I used a green paper and glued it to the frame backing
Then add your embellishments. 


We don't go to many movies, so I didn't use the "admit one" quote that a lot of people use. Do whatever you want! It's your memory box!

Step Two: Add your memories! I had to restrict ours to tickets and wristbands only to keep it from looking too cluttered. 


Step 3: Hang!
Everything got a little shook up when I set the frame down on its side, but I gave it another good shake and got a new pattern! 

Here it is, next to our travel map. I love all the memories being in one place. 

A lot of tutorials call for cutting a slot in the frame (or buying one that comes with a slot already) I decided to go the easier route and just place them inside and close it up. I knew it would hang in the hall, and I was worried that too much dust would get into the frame if it had an opening on the top. But mostly, it just seemed like too much effort for a small convenience later.

It was such an easy project, I'm annoyed that I didn't get to it earlier! Now I have to go on a hunt to find all the other tickets we wanted to keep but didn't have a place for.

-DearLadyDisdain
Now you talk of a sheet of paper, I remember...

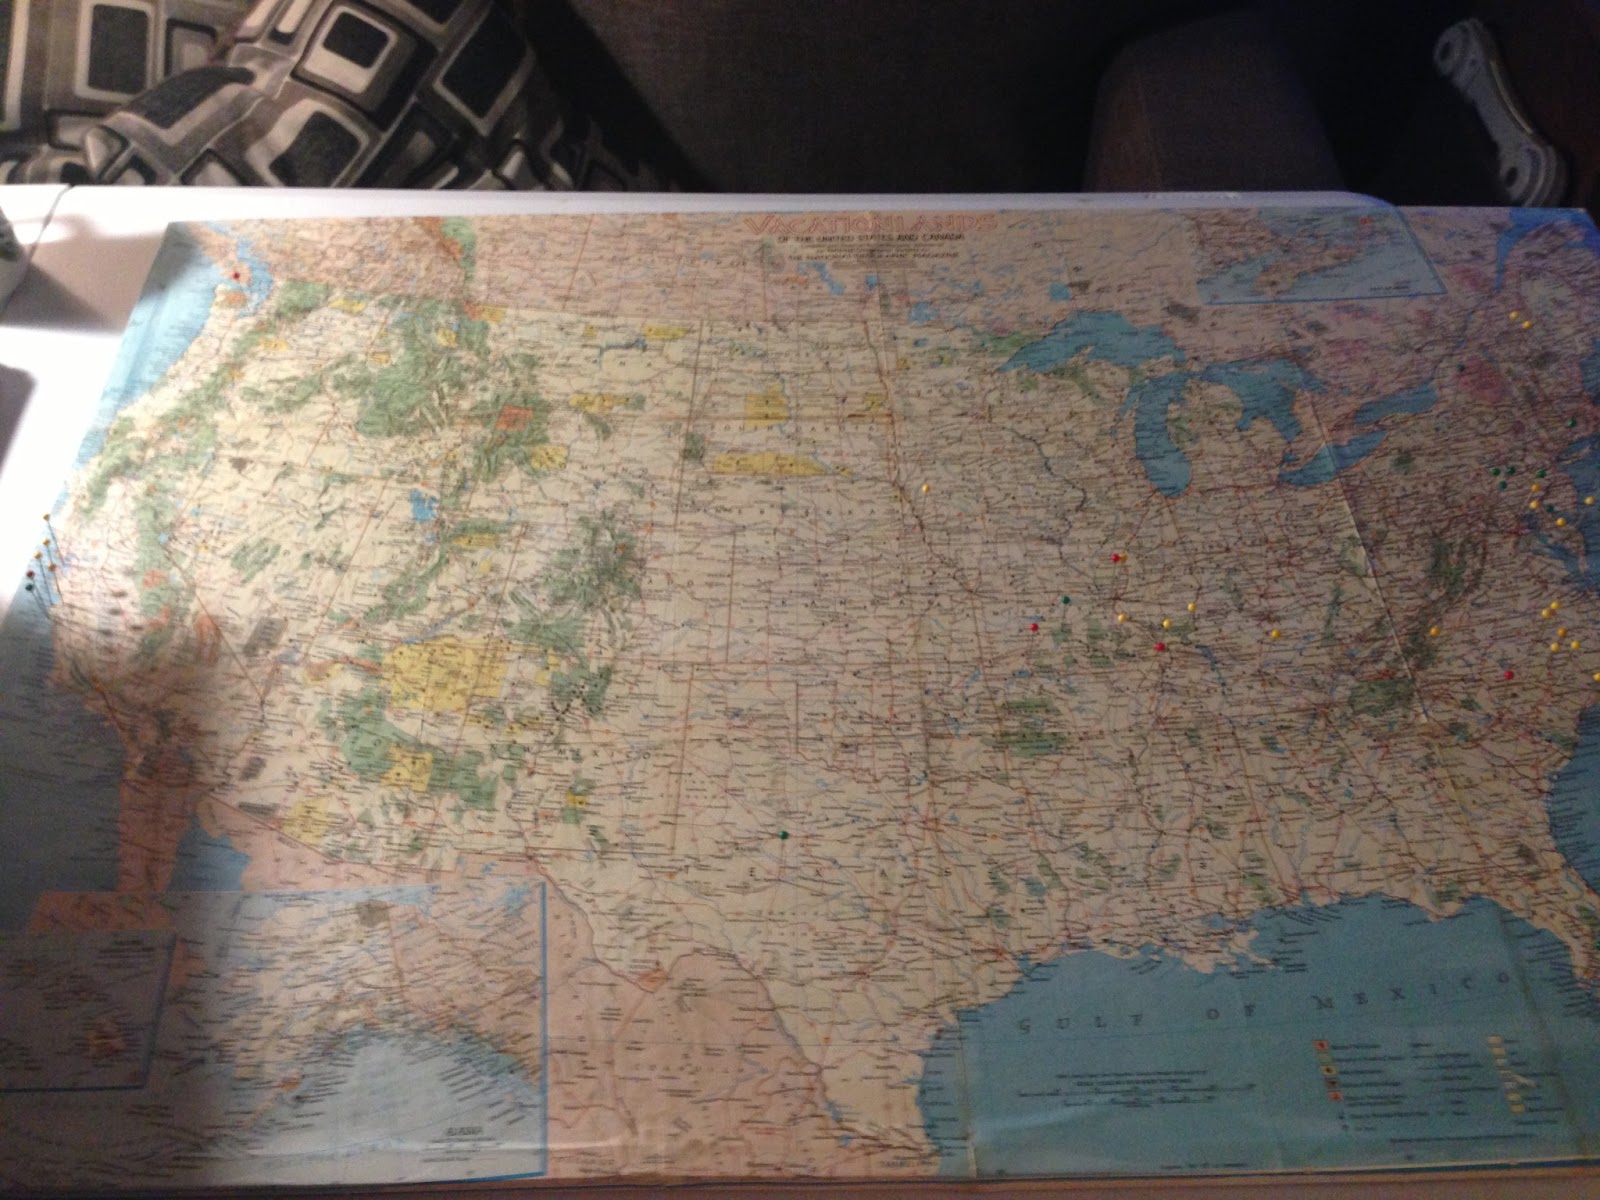
Cork Board Map of Our Travels

I love the look of old maps. So does DH. I always see adorable crafts on Pinterest with old maps, but I never got around to making one. Until this weekend.

EDIT: I got some requests for more info on this project, so I decided to add some more details!


DH picked up a pack of 3 laminated maps at a yard sale two months not that long ago. I planned on using one of those, but it was too big to fit on my bulletin board. It was also laminated and too new looking.

Then I remembered a stack of old travel maps we bought awhile ago. One of them was a National Geographic map of places to vacation. From 1966, it had just the look I wanted.


So here's the how to. (Sorry for the lack of photos)

Supplies:


  • Glue (I used a 4 parts glue, 1 part water mixture)
  • Paint Brush (I prefer sponge so no hairs get left behind)
  • Mod Podge (I used matte for sealing)
  • Straight pins (I looked at a few stores, then finally founds some at JoAnn Fabrics. I got the multi colored packs (on sale for $1.50), but they also have packs of all one color)
  • Cork Board (I've had mine for 10 years, and it was pretty beat up, but it worked great)
  • Map! The one I found that worked best was an old travel map, the kind that fold up.
  • Something heavy (to flatten out the creases)
  • Patience! 


Lay out your map over your cork board. Be sure that Maine to Florida fit. Place books or something heavy on the creases to flatten them. Leave over night (the hardest part for me)


Now to glue! This is when being a folding map really came in handy. I did one panel at a time. Apply glue to the cork, and to the map itself to be sure it sticks. Flatten it out. 


My board had a metal frame around it, which I left in place since it had hangers in the back. I then wrapped the map around the edges and glued it to the sides of the frame too. Add a layer of Mod Podge or other seal. Let dry. I still had some air pockets, especially at the top, from doing the edges before the part on the cork finished drying. Luckily it's a topographical map, and little bumps disappear into the mountain ranges. 


DH and I had a lot of fun placing our pins on the map. Red is for me; green is for him. Yellow is places we've been together. I wish there were more yellow dots, but I think we're doing good for having been together 5 years. You decide what warrants a pin. We were both in the military, and did a lot of cross- country travel. We decided airports or driving through doesn't geta pin. And no pin if you were too young to remember the trip either.  


All finished and hanging in the hallway. 


I absolutely love the way it looks! I can see the places where I messed up, but since there will be lots of little pins, I don't think it matters too much. The best part? This got us excited for planning trips to visit friends and family next year and looking for new places to stop along the way! 

-DearLadyDisdain